Last Updated: June 17, 2020
After spending almost three years in Costa Rica, coming and going on a tourist visa, we have decided to apply for residency. This is a big step for us as it means we’ve committed to staying here permanently, at least for an extended period of time. While most people use a lawyer for the residency process, we had heard mixed reviews about the results. Inspired by others who had done it alone, we felt that this was something that we could probably handle ourselves too. In this post, we’ll cover our experience applying for residency in Costa Rica without a lawyer.
IMPORTANT: We applied for residency in May 2016, but have updated this post as best as we can with current information. Keep in mind that the requirements are constantly changing and people’s experience with the process can differ. Use this article as a guide, but always refer to Migracion’s website for the most current information. If you have applied for residency yourself and something was different for you, please leave a comment below to help others applying.
See the bottom of this post for an update on when our applications were approved!
Types of Residency in Costa Rica
Before moving to Costa Rica, we did a lot of research about the different types of residency available. We won’t go into detail about all the options here, but there are three types that most people consider.
Pensionado
Applies if you are getting a certain amount of pension or retirement money on a monthly basis.
Rentista
Applies if you put a certain amount of money in a Costa Rican bank to live long-term.
Inversionista
Applies if you invest a certain amount of money in Costa Rica by purchasing a property, business, or making another type of large investment.
Temporary vs. Permanent Residency
These types of residency, if granted, require that you be a temporary resident for three years before you can apply for permanent residency. Permanent residency comes with more benefits than temporary residency. For example, with permanent residency, you have all the rights of a citizen (except voting) and can work legally in Costa Rica. Temporary residents can own/run a business, but must hire employees to do any labor. Both temporary and permanent residents must pay into the Costa Rica health care system called the Caja.
Residencia Permanente Por Vinculo
There is also a way to obtain permanent residency without having temporary residency first. Residencia Permanente Por Vinculo requires that you have a first-degree blood relative (e.g., parent, child, or sibling) who is Costa Rican. Because our son was born here and was, thus, given immediate Costa Rican citizenship, this is how we applied.
Residencia Permanente Por Vinculo also applies if you marry a Costa Rican. But in this case, you are only granted temporary residency and must wait the three years to apply for permanent status.
Note: While our application process may be a little different than yours if you are applying other than through a relative, much of the paperwork and process is the same. Hopefully our experience will help you get started, but don’t rely on our information alone.
Overview of the Application Process
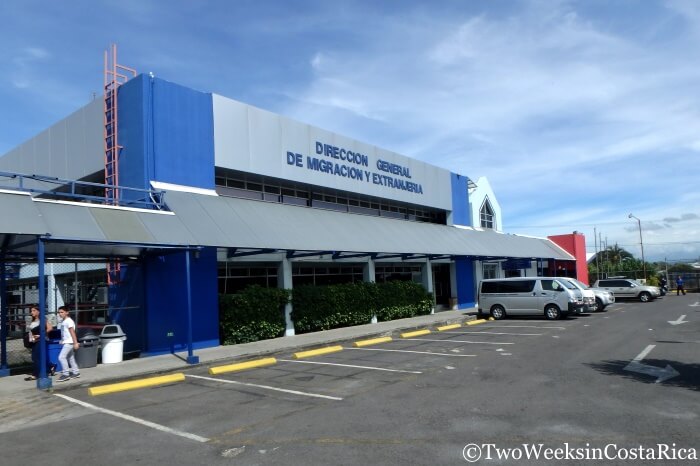
Applying for residency in Costa Rica is done through the Direccion General de Migracion y Extranjeria (the General Directorate of Immigration and Nationality), better known as Migracion. Information about the different types of residency and how to apply can be found on their website under the Personas Extranjeras tab.
Migracion’s website should be your main guide in figuring out what you need for your application. The instructions are quite detailed. Although they are all in Spanish, Google Translate or a friend who speaks Spanish can help you work through them. Google Translate also will let you upload a document (like a PDF) and translate the whole thing.
Sometimes, even with translations, the instructions are not clear. Asking others who had completed the process helped us, and we will try to clarify whenever possible. The application instructions we followed for Residencia Permanente Por Vinculo can be found here.
Applying for Residency in Costa Rica: A 10-Step Guide
One thing that we wished we had when starting this process was a step-by-step guide, mostly because the timing of when to do things was not clear. We couldn’t find one so we made our own:
SEVERAL MONTHS BEFORE APPLYING
Step 1: Check Your Passport Expiration Date
Make sure that your passport will not expire during the application process. Although Migracion is supposed to approve or deny residency applications within 90 days, sometimes it can take a year or more so you want to have enough time on your passport for delays. A different passport number halfway through the process could potentially cause problems. Matt renewed his through the US Embassy in Costa Rica, and it came in about two weeks.
Step 2: Gather Documents from Your Home Country
Request the necessary personal documents from your home country. They are valid for only six months from the date of issuance according to Costa Rican requirements. The timing can be critical, as we note below with respect to the FBI background check. You might need more documents than this depending on your specific circumstances, but in general you will need the following.
Keep in mind that these documents will need to be apostilled. This is because they are foreign documents, so they will need to be authenticated in order for you to use them in Costa Rica. For federal documents like a federal background check, the US Department of State does the apostille. For state documents, the applicable government entity in the particular state does it. This is often the state’s Secretary of State. The apostille step basically means that they put a stamp or seal on the document, but it often involves an extra step for you so it’s important to remember. Here is a link with more explanation.
(1) A Criminal Background Check from where you lived for at least three years prior. If you are from the US, to our knowledge it is now better to get an FBI background check, rather than one from the state where you lived. We have heard that sometimes they will accept state background checks. Other times, they will notify you later that you need to obtain the federal background check, causing your application to be delayed.
We went to a local police station in Costa Rica (OIJ) and had them take our fingerprints on the FBI form, then mailed the application to the FBI. See the FBI website for instructions.
The background check will then need to be apostilled. In the US, that meant mailing it to the US Department of State.
(2) Birth Certificate: You request this from the state/place of issuance and then get it apostilled. In the US, each state has a different process. For Jenn’s, we had to request it first then send it back to a different office for the official apostille. The state where Matt was born did both at the same time.
(3) Marriage/Divorce Certificate: Request from the state of issuance and then get apostilled. Note: This was not a requirement for our residency application, but we included our marriage certificate anyway, just to be safe.
IMPORTANT: This is one instance when the timing is critical. Our FBI background checks took almost 15 weeks because processing was so backed up. Because of this, we had to request a second set of state documents (marriage/birth certificates) in fear that they would expire. Make sure to check the FBI website for the processing time before applying for the rest of your documents, which generally take only a couple of weeks.
Step 3: Register with Your Consulate
Register with your home county’s consulate in Costa Rica. For us, this was the US Embassy in Costa Rica. We were easily able to register online for the STEP program and print the form. It does not need to be notarized or apostilled, just translated (see Step 5, below).
SEVERAL WEEKS BEFORE APPLYING
Step 4: Notarize Your Passport
Have every page (even blank ones) of your passport copied and notarized by a Costa Rican notary public. In Costa Rica, lawyers are also notaries so we went to a local lawyer’s office. He put his seal on the copies and signed each page. He then glued them together like a booklet and added timbres (stamps that make documents official in Costa Rica).
Step 5: Translate Documents
Get all documents that are not already in Spanish translated by an official translator. Here is a link for the list of official translators. This includes the required documents from your home country (Step 2, above) as well as the consulate registration (Step 3, above).
We used Tiger House Translations in San Jose. They made it very easy. We emailed them scanned copies of everything because we live far from San Jose. A few days later, our translated documents were ready for pick-up. They also can mail or send them by courier service.
Step 6: Complete the Rest of Your Residency Packet
This will include:
(1) Application Form: The form from Migracion (Formulario de Filiacion), which asks for general information like your name, age, occupation, etc.
Note that the application form has a place to put a fax number so that they can contact you if there is a problem or they need more information. We think that an email is now sufficient if you do not have a fax. Migracion’s current regulations state this. We also asked the official at Migracion when we submitted our application, and he said it was fine.
(2) Letter: A letter to the Director of Migracion, typed in Spanish, with the reasons you are requesting residency. The letter needs to have your full name, nationality, age, occupation, full address where you live, and means for notifications.
IMPORTANT: Don’t sign the letter. The letter must be signed in front of the Migracion official when you make your application.
(3) 2 Passport-Sized Photos (Costa Rica size, which are a little smaller than US ones). Purchase at any photo shop.
(4) Pay Fees: As instructed, we paid $50 each for the application fee and $200 to change our status from a tourist visa to a visa for permanent residency. You will also need to pay ₡125 + ₡2.50 for each page of the application. Previously, you paid this fee through timbres, but now it can be deposited into the bank account along with all the other fees. The application instructions have the bank account information.
Be sure to make separate deposits, in colones, based on the exchange rate the day you go to the bank. The receipts, which will have your name on them, are included in your application.
(5) Registry Documents: If applying for residency through a direct relationship with a Costa Rican, you will need the document proving this (e.g., birth certificate, marriage certificate) with timbres. See our post about Baby Paperwork in Costa Rica for information on how to obtain a Costa Rican birth certificate. The Registry document must not be more than two-months old.
(6) Additional Documents: Other applicants may have to provide additional or different documents. For example, proof of retirement funds if you are applying for Pensionado status, investment documents if you are applying for Inversionista, etc.
DAYS LEADING UP TO APPLYING
Step 7: Fingerprinting
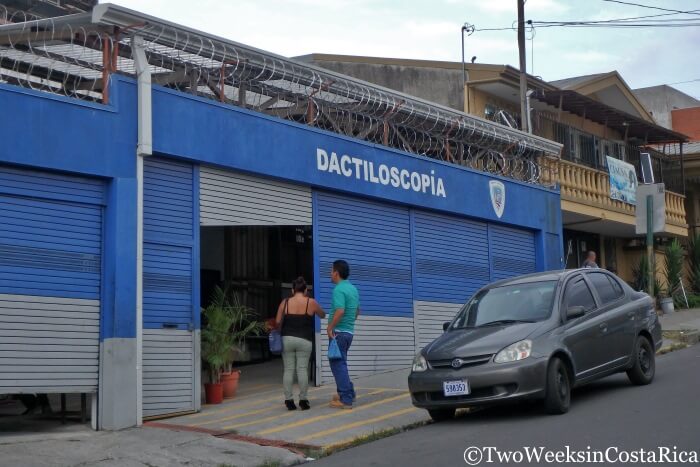
Register your fingerprints with the Ministerio Seguridad Publica (Ministry of Public Security) in San Jose. This applies to all people over 12 years old.
When we applied, we just showed up to get the prints done and they saw us without any trouble. However, we have heard more recently that an appointment is now required. The Ministry of Public Security has some phone numbers on their website to make an appointment.
The Registro Dactilar building is located on Av. 8 between Calle 31 and 33 (map). When you arrive, they will give you a form to fill out your basic information. It is in Spanish and English, but they will want you to write your responses in Spanish. The questions are fairly easy, but you will need to know your height in centimeters and weight in kilograms. You will also need a couple of passport-sized photos, your passport, and we needed a copy of our son’s birth certificate.
After you fill out the form, you will have a short interview with a Ministry official who will put your information into the computer. Then your prints will be taken, and the officer will give you a document that you attach to your residency application.
Step 8: Make Copies of Your Completed Application
Make photocopies of everything that you will be submitting. We have heard horror stories of Migracion losing applications.
SUBMITTING APPLICATION
Step 10: Apply
Where and When to Go
Submit your application at the Direccion General de Migracion y Extranjeria headquarters in La Uruca (map) or another approved office. The Migracion website lists other locations for submission such as Liberia, Puntarenas, Paso Canoas, Limon, and San Carlos. We have heard of people using some of the smaller offices with luck since they are generally less busy.
Migracion is open from 8 a.m. to 12 p.m. The La Uruca Migracion Office is closed the last Friday of every month.
If you are traveling from outside San Jose and looking for a hotel the night before, we stayed at Hotel Plaza Real. It is a five-minute drive away, clean and comfortable, and very affordable.
Our Experience Applying
We arrived shortly after 8 a.m. at the main headquarters, which was busy, but not as busy as we expected. The guard at the door directed us to the special assistance line since we had our baby with us. Others should arrive earlier to get in line. Wait times can be extremely long, and Migracion stops taking new tickets at noon.
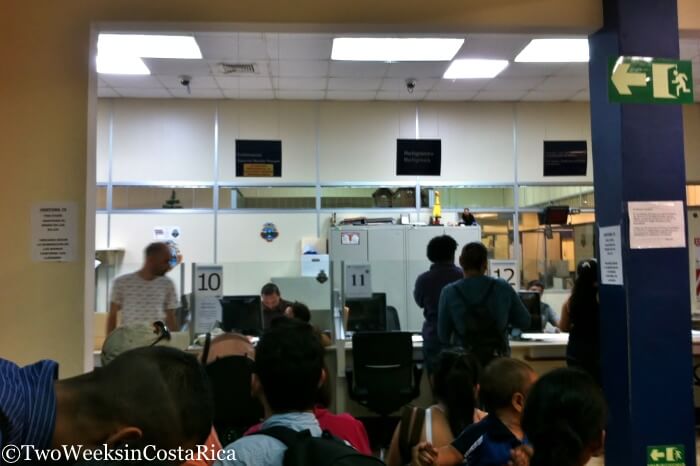
After about a 30-minute wait, it was our turn. We went up to the window and the Migracion official processed our applications. He sifted through our papers, checking the documents that we included, and put our information into the computer.
The process took about 15 minutes for each of us. At the end, he gave us a printout with our file number (numero de expediente) and a checklist of the documents we submitted. The applications were kept separate and we have different expediente numbers, even though we are one family.
Once you have the file number, you can check your status online on the Migracion website. Within a day, our information was in the system and the status was showing that it was being processed. If Migracion needs additional information, they are supposed to contact you using the means you provided (e.g., fax, email) and you have 10 days to supply it.
Cost of Applying for Residency in Costa Rica (per person, estimated)
- Application Fees – $250
- Birth Certificate with Apostille – $25
- Marriage Certificate with Apostille – $25
- Criminal Background Check (FBI) with Apostille – $26
- Translation of Documents into Spanish – $82
- Passport Photos – $8 (we suggest you have extra, just in case)
- Legal Fees (notary for passport pages) – $30
- Mail Services (from Costa Rica to the US) – $50 (note: we visited the States once and had visitors bring documents, which helped limit this)
- Photocopies – $10
- Timbres – $3
Total – $509
Final Thoughts
Five hundred dollars per person isn’t too bad for applying for residency in Costa Rica, especially when you consider the benefits we’ll get. We won’t have to leave the country to renew our visas every three months anymore and will be able to work as an employee here if we want. It will also be a lot easier to open a bank account, get a Costa Rican driver’s license, etc.
Now the only thing we can do is wait to see what happens. Migracion is supposed to notify us if there is anything missing or further action is required. They are also supposed to make a determination within 90 days. As we said, though, we have heard that months, and even years, can pass without hearing anything at all. We’ll be sure to update this post with our status as soon as we can. Hopefully that will be soon!
UPDATE – APPROVAL (August 22, 2017)
Getting the Final Resolutions
As of yesterday, August 22, 2017, we have our final approvals! It took about 1 year and 3 months from making the initial applications to receiving our final approvals. Here is how the final steps of the process worked.
Last February, we went to Migracion to check on our applications in person. They pulled our files and told us that we had our notificada firma (signed notices) and that the status would change in the computer in a few days. This meant that we only needed the final signatures and we would be all set. We have heard that normally this takes a few weeks, but when we went to check on them a couple of months later, they told us to come back in two weeks because they were backed up and had a list of people ahead of us.
Since we live far from San Jose, we used a lawyer who does residency and regularly goes to Migracion to check on our applications from this point on. He checked over the course of the next few months and they were finally ready in late July! We just had to wait a few more hours at Migracion and left with our resoluciones (resolutions approving our applications).
Signing up for Caja and Getting Cedulas
After we had our resolutions, we had to go to our local office to sign up for the CCSS (Caja Costarricense de Seguro Social) and pay the required fees. Then we could call the Migracion hotline (1311) to make our DIMEX/cedula appointments.
Our DIMEX appointment was at Correos Central in downtown San Jose. Migracion headquarters in La Uruca was so full that we wouldn’t have been able to get in there until mid-October.
The process was easy and efficient at Correos. They took our photos, entered the final information, and told us that they would be mailing our cedulas in October. Again, this is only supposed to take about a month, but they are backed up so two months is more likely. It doesn’t matter much to us because we are done and are now officially permanent residents of Costa Rica!
Additional Information
- US Embassy in Costa Rica: The US Embassy has general info on the requirements for getting residency.
- Association of Residents of Costa Rica: ARCR is one of the leading companies for obtaining residency in Costa Rica. They have a lot of info on their website about the process and also an active forum where you can ask questions even if you don’t plan on applying through them.
- Facebook Expat Groups: These groups are a great place to find information from other people going through the same process. We used them to research fingerprinting, criminal background checks, etc. There are several groups, but a couple of really active ones are Expatriates in Costa Rica and Gringo Expats in Costa Rica. Use the search function to find old threads or post a new question if you’re still stuck.
Help from a Lawyer
Keep in mind that although we did the process ourselves, our applications were relatively straightforward because of the type of residency status we were seeking. Many people prefer to use a local lawyer to make sure that the process goes smoothly. It also can be very helpful if you don’t speak Spanish.
Have you recently applied for residency in Costa Rica? Leave us a comment with any tips below.
Last Updated: June 17, 2020
The information in this post is provided for informational purposes only and is not intended to be legal advice. While we have tried to ensure that the content is accurate and current, we make no guarantees. You should seek legal or other professional advice before acting or relying on any of the information.
Looking for more information about moving to Costa Rica? Check out these posts:
- Digital Nomad Visa – Costa Rica has a new visa for those who work online. It allows you to stay for one year and is easier than getting regular residency.
- FAQs About Moving to Costa Rica – Answers the most commonly asked questions about life in Costa Rica, including cost of living, internet availability, etc.
- Moving to Costa Rica with Kids – If you’re planning a move with kids, you will want to check out this article. It covers schools, working as a foreigner, problems with shopping, vaccines, and more.
- Where to Live in Costa Rica: Planning Your Research Trip – Helps you plan a visit to Costa Rica to figure out where you might want to live.
- Costa Rica Moving Checklist – Step-by-step guide for what to do before moving to Costa Rica. Covers mail service, banking, and what medical and other services to get done before you move.
